
When you publish a new post on your blog, information about the post is also displayed – such as the time it was published, the author, the labels attached to the post, the location, share buttons, etc.
In today’s tutorial I’m going to show you how to rearrange/move those elements in the post header and post footer section. Blogger seem to have an easy way to do this by going into Layout > Edit Blog Posts Gadget and moving the elements (as shown in the image below) but it almost never works.
Heads up! This post is no longer being updated, so some details may be out of date.
how to re-arrange your post header and footer section
Here’s what to do instead. Go to Template > Edit Html > Search for the following code. If you are having trouble finding the code take a look at this tutorial about using Bloggers HTML Editor.
<div class=''> ... </span>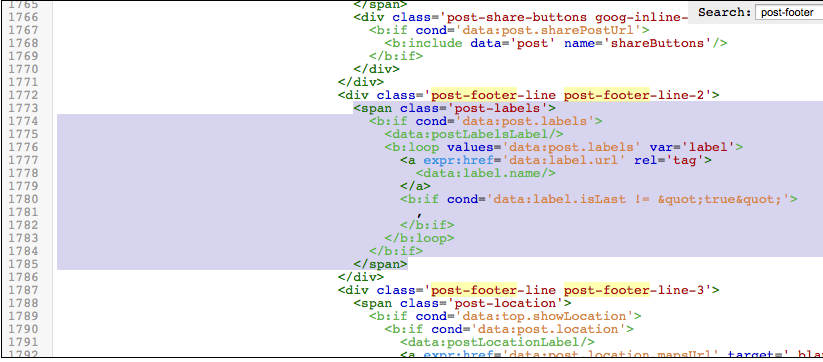
Delete it from the area it’s it and move it to the previous/next line or to the header area.

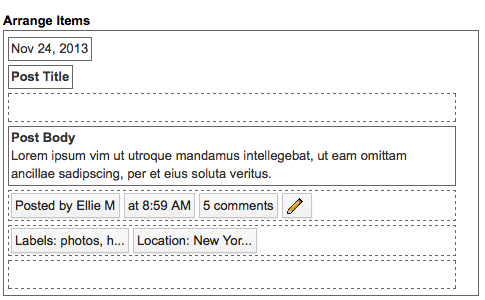
Post Header & Post Footer
Here’s a list of areas you can move the information too. If you want to have the date, author, labels, etc all shown in a row, just paste them one after another under one of these areas.
Post Header Area
<div class='post-header-line-1'/>Post Footer Line 1
<div class='post-footer-line post-footer-line-1'>Post Footer Line 2
<div class='post-footer-line post-footer-line-2'>Post Footer Line 3
<div class='post-footer-line post-footer-line-3'>Related Posts
Now that you know how to edit these sections, you could try adding other functions to them.
Add custom share links to your blog posts
Add social media links to your blog posts
Move date header below the post title